How to trigger Notices?
Introduction
How to trigger Notices via Whatsapp?
Introduction
The Legodesk team can define workflows and set up triggers to ensure the pre-settlement compliances are met thoroughly as per the Section 138 NI and SARFAESI Act. It simplifies sending legal Notices, ensures smooth case tracking and delivery of the Notices.
Trigger Notices via Whatsapp
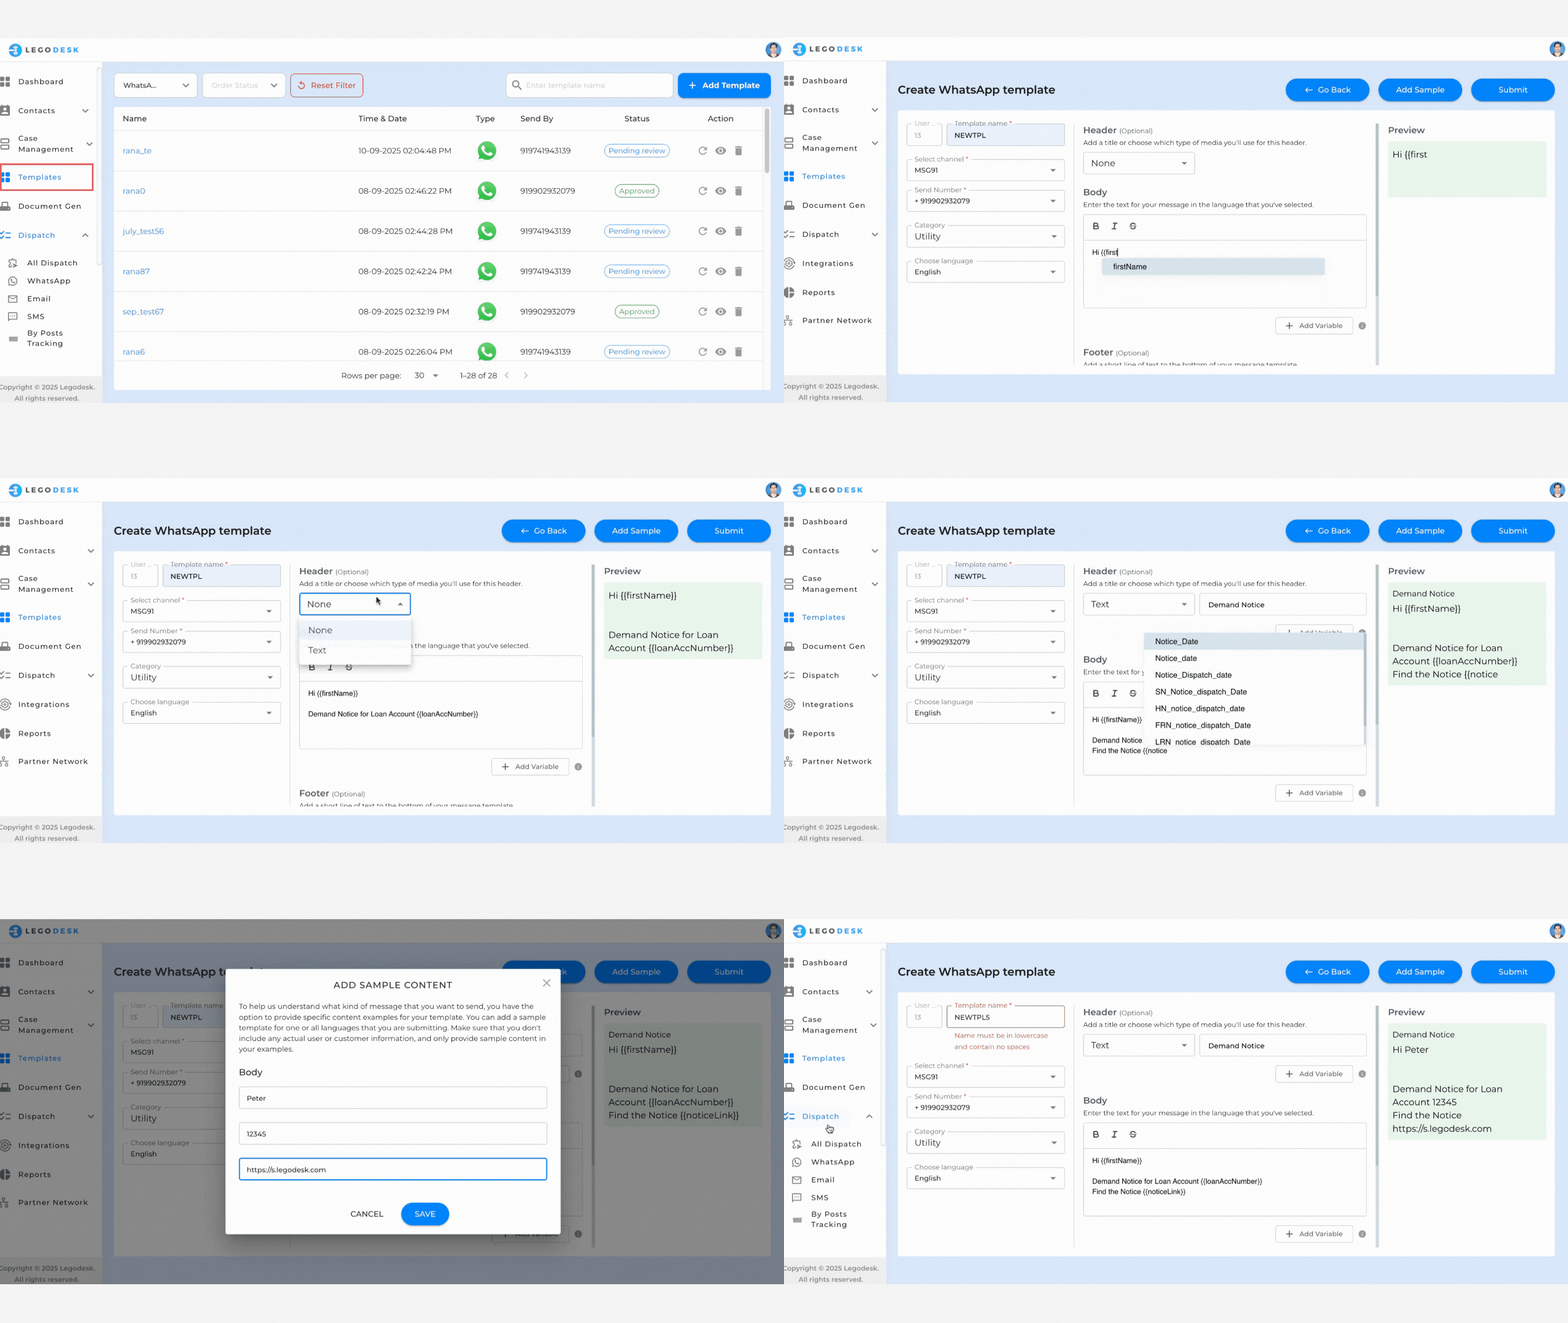
- Navigate to Templates
- Go to the Templates Menu > click on the Add Template dropdown and select WhatsApp.
- Enter Mandatory Details
In the Create WhatsApp Template interface, fill in all required fields:- Template Name
- Sender Number
- Category
- Language
- Configure Template Content
- Header: Select a header type, enter the description, and add variables if necessary.
- Body: Add the body text with variables as required. Use the Add Sample option to include example content.
- A confirmation pop-up will appear: “Sample added successfully!”
- Footer (Optional): Add a short descriptive line and variables, if needed.
- Buttons: Create interactive buttons using the Add Button option, enabling customers to respond directly.
- Preview Template
- A Preview Panel on the right side displays a real-time view of how the template will appear to recipients.
- Save and Submit
- Once all content is entered, click Save.
- Review the template, then click Submit to finalize.
Dispatching Notices via Whatsapp
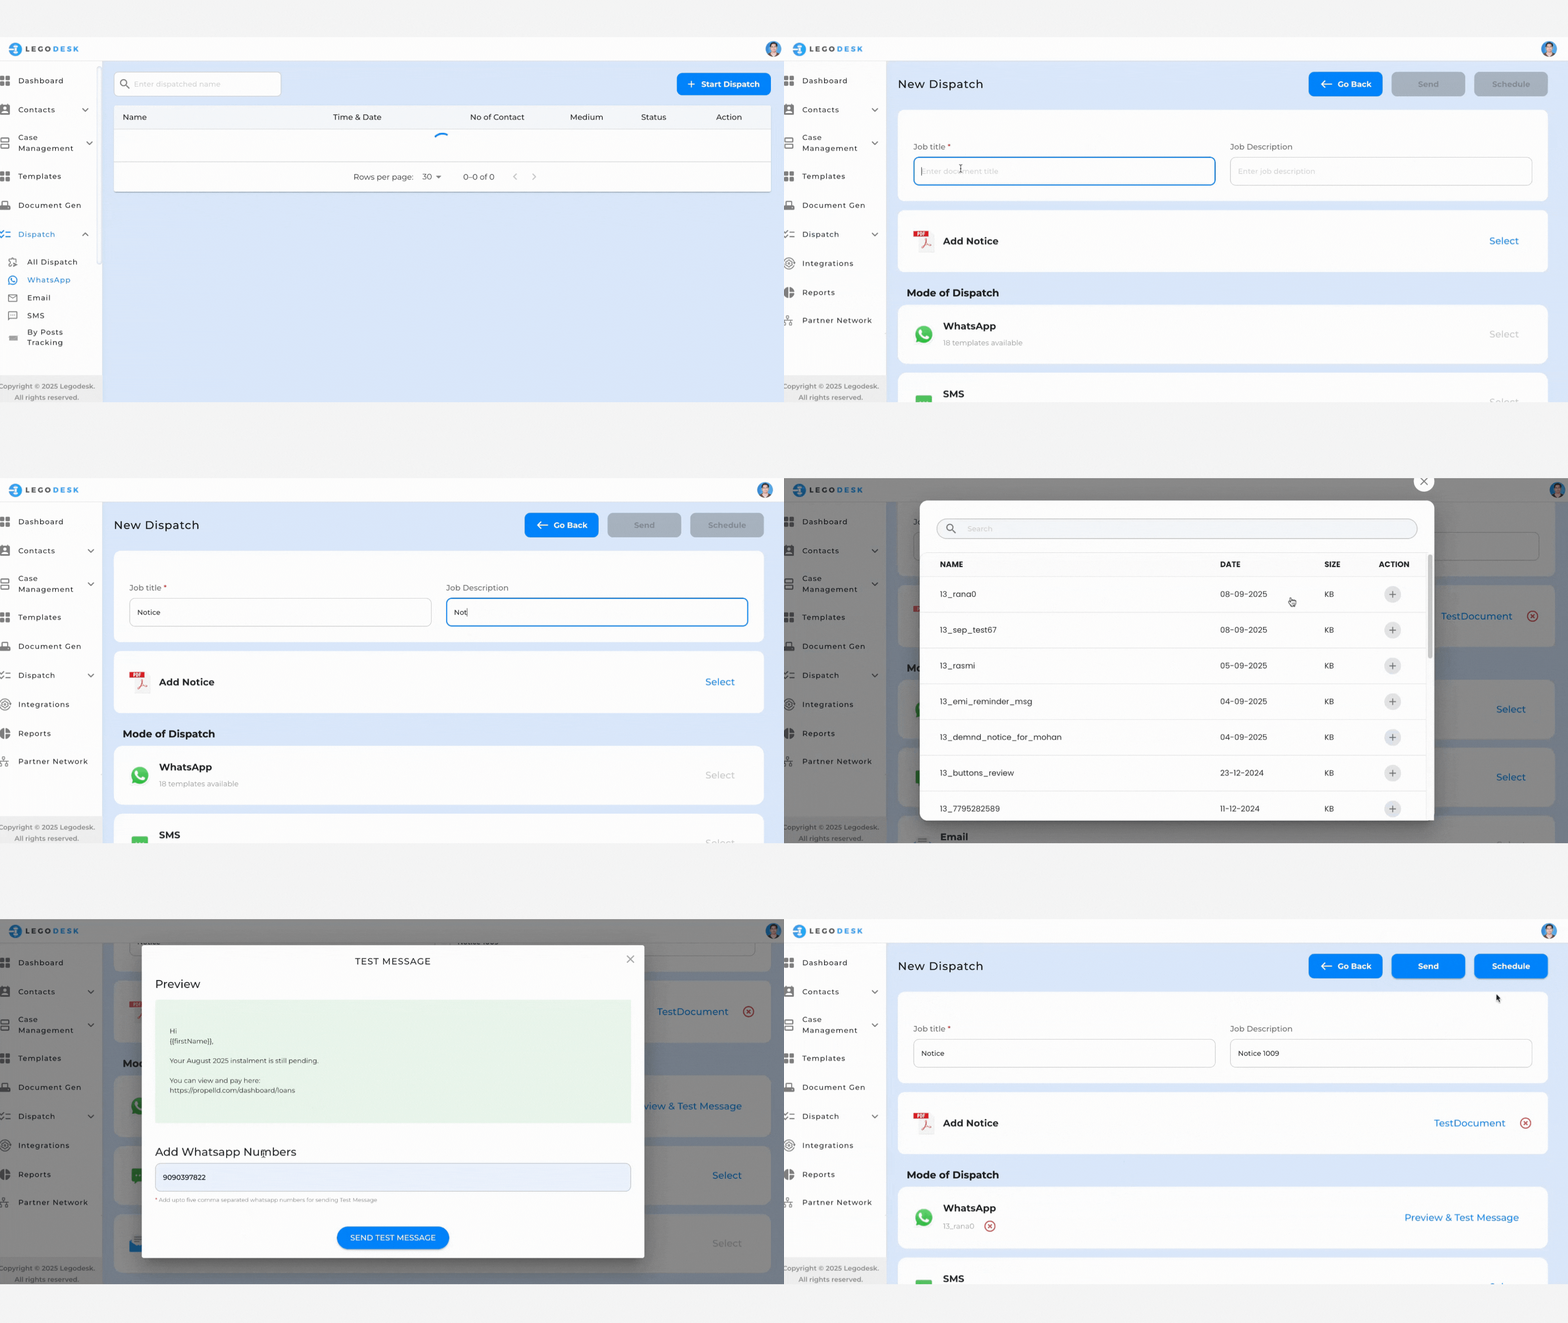
- Navigate to Dispatch
Go to the Dispatch dropdown and click WhatsApp.
You will see all templates associated with WhatsApp dispatch notices.
Start a New Dispatch
Click Start Dispatch and select Dispatch Notice.
The New Dispatch interface will open. Fill in the mandatory fields:
Job Title
Job Description
Select Add Notice
Under Add Notice, click Select.
A pop-up will appear displaying all available templates.
Choose your desired template by clicking the plus icon (+) in the action column.
Choose Dispatch Mode
Select WhatsApp as the mode of dispatch.
Preview & Test Message
Click on Preview & Test Message.
A pop-up will display the preview of the WhatsApp message.
Enter the WhatsApp numbers to which the test message should be sent.
Click Send Test Message.
Confirmation
A confirmation pop-up will appear:
“Testing WhatsApp message successful. Please check your account.”
Scheduling and Tracking Notices
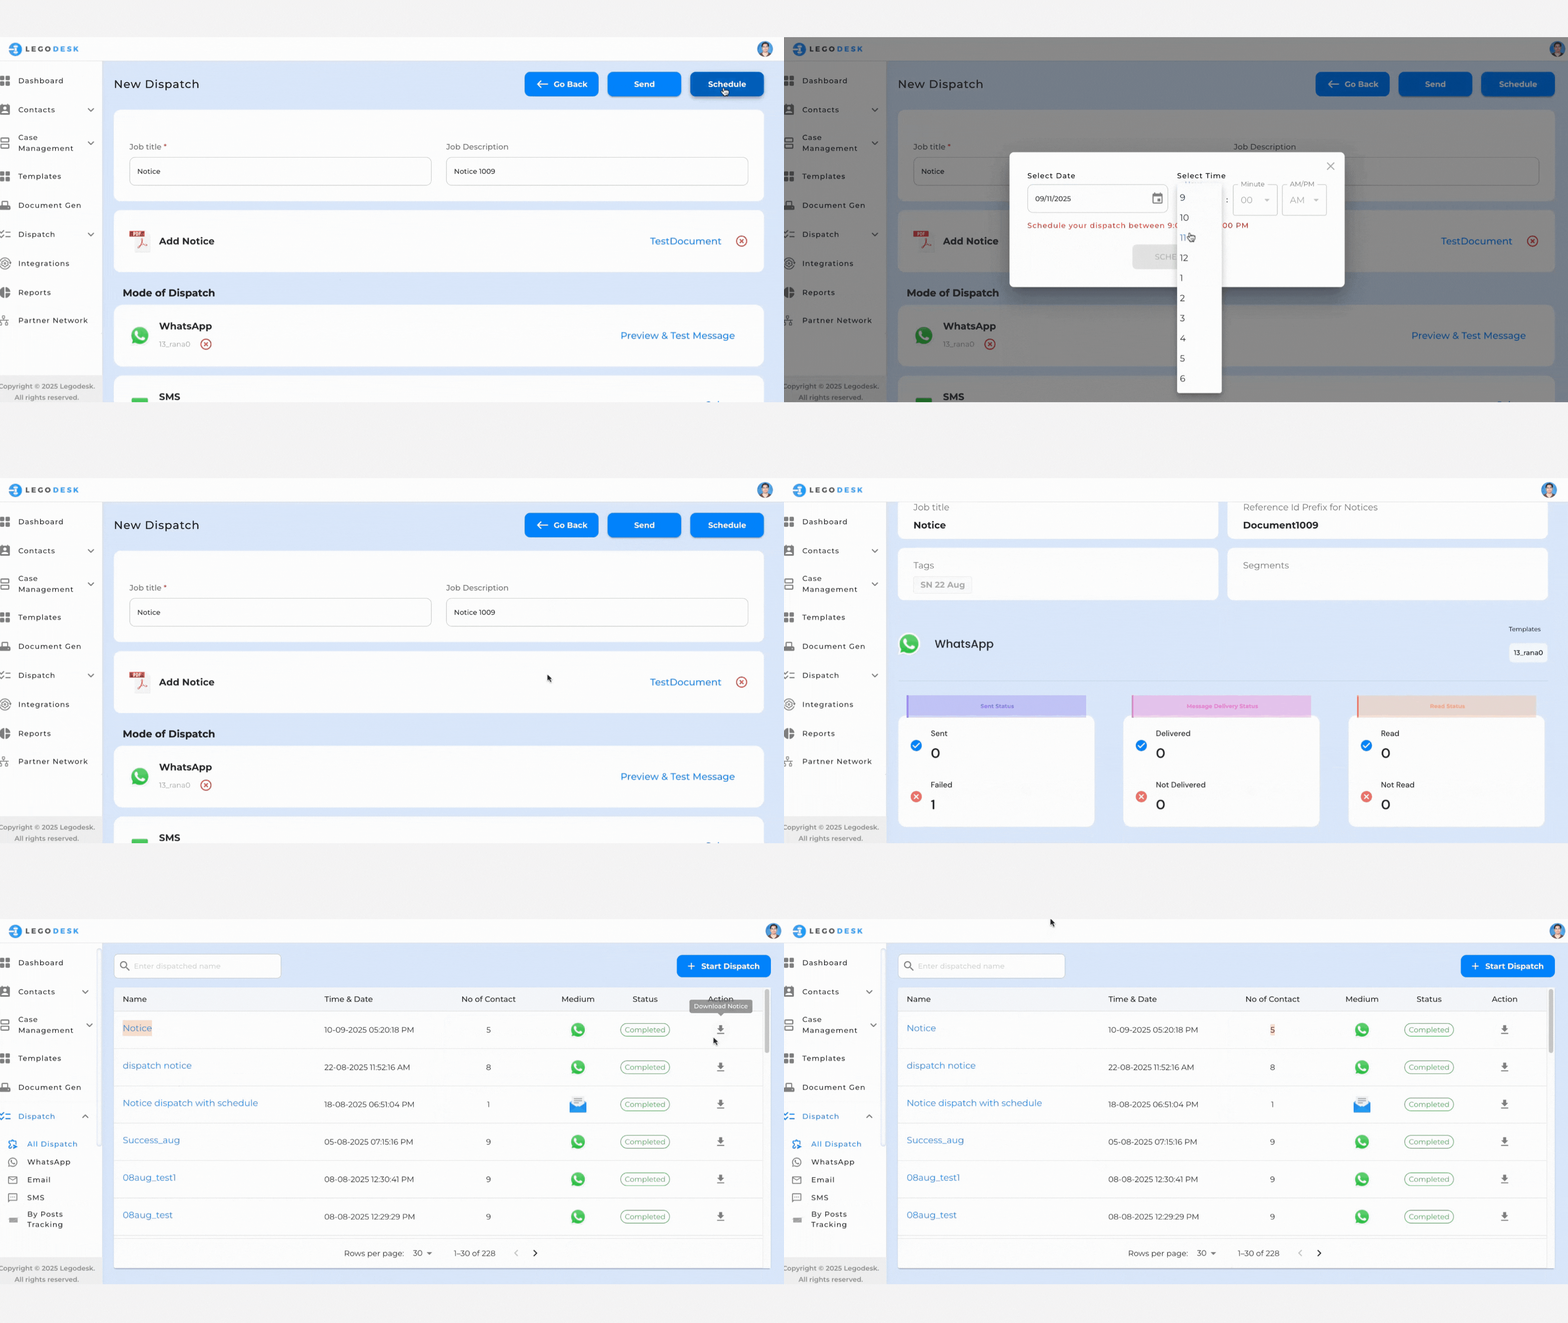
After completing the dispatch, users can schedule notices by clicking the Schedule button. Select the desired date and time for sending the notices, then click Schedule to confirm.
By clicking Go Back, users can view:
Sent Notices Status
Message Delivery Status
Read Status
The Dispatched Notices interface will display a list of all dispatched notices, including details such as the number of contacts associated with each notice.
Users can also download a copy of any notice by clicking the Download icon in the action column.